Let's walk through the step-by-step process of leveraging the Closing Cost Summary feature in the QuickQual Calculator. This tool provides a detailed breakdown of closing costs associated with a loan scenario, offering a comprehensive view for borrowers, agents, or yourself.
- Verify Feature Availability:
- Check if the Closing Cost Summary feature is available on your calculator. If not, it might be turned off by default. The Closing Cost Summary function is done at a branch level (meaning that within a branch one user cannot have this turned on and another have it turned off). To enable it, send an email expressing your interest to support@lenderlogix.com.
- Check if the Closing Cost Summary feature is available on your calculator. If not, it might be turned off by default. The Closing Cost Summary function is done at a branch level (meaning that within a branch one user cannot have this turned on and another have it turned off). To enable it, send an email expressing your interest to support@lenderlogix.com.
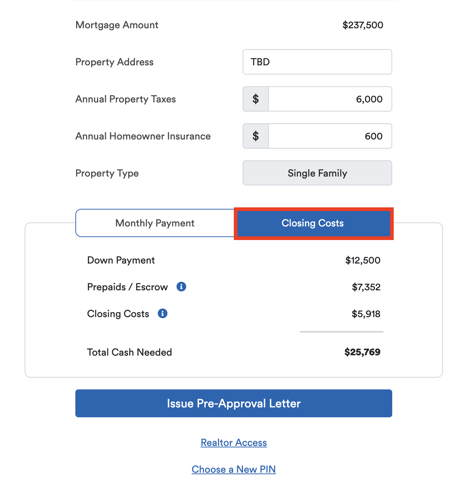
- Access Closing Cost Details:
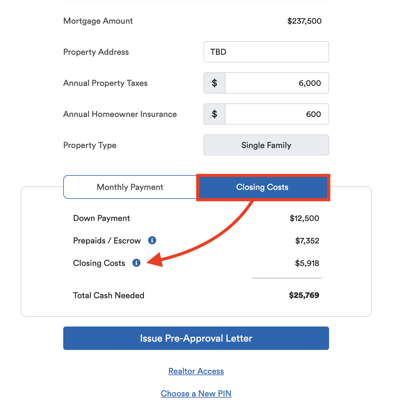
- Open the QuickQual Calculator and navigate to the Closing Costs tab while running a scenario:
- Look for the small "i" icon next to the "Closing Costs" item and click on it. This action will display an itemized list of various fees associated with the loan:
- Open the QuickQual Calculator and navigate to the Closing Costs tab while running a scenario:
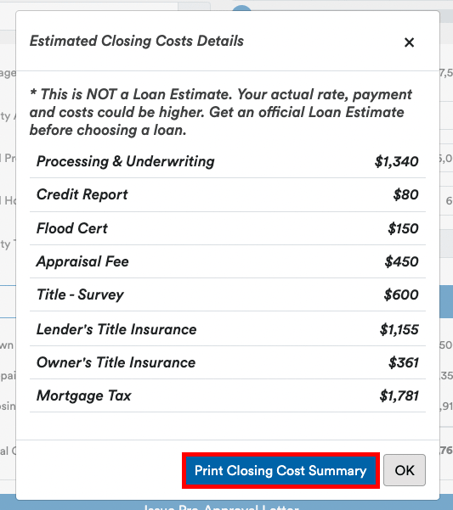
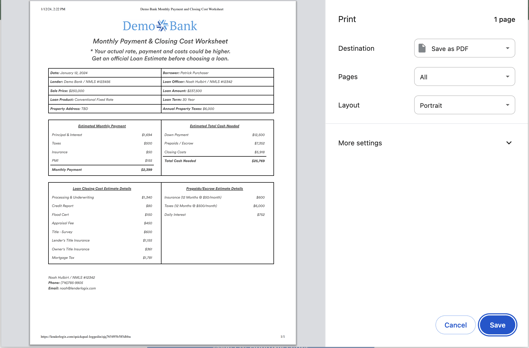
- Generate the Closing Cost Summary Document:
- If the feature is enabled, you'll find the "Print Closing Cost Summary" option at the bottom.
- Click on this button to open a branded PDF of the closing costs summary. It also includes your name, NMLS, and a signature line:
- If the feature is enabled, you'll find the "Print Closing Cost Summary" option at the bottom.
- Customize Access (Optional):
- The Closing Cost Summary feature provides flexibility. When you opt to have the Closing Cost Summary feature turned on, you can choose to provide access to the documents to either your borrowers, agents or both. If you have specific preferences, reach out to our support team and we will be happy to assist!

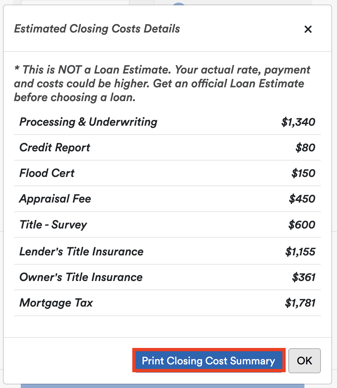
Note: the option to generate a closing costs summary is only available when the borrower is considered qualified for the scenario being run. If a scenario renders the borrower unqualified, the "Print Closing Cost Summary" feature will be grayed out and unavailable.
By following these steps, you can seamlessly incorporate the Closing Cost Summary feature into your loan scenarios.