Managing realtors within your QuickQual account is a straightforward process. Here's a step-by-step guide to help you add or remove realtors with ease!
1. Access Your Dashboard or "My QuickQuals" Page:
-
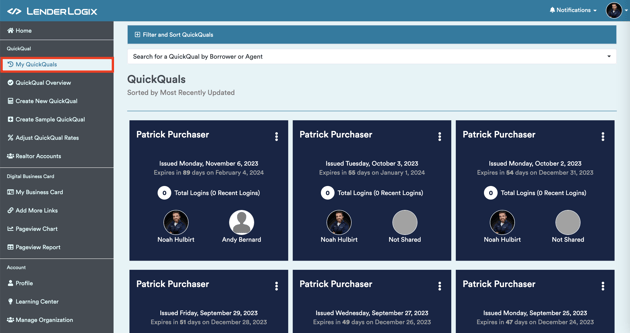
- Start by navigating to your QuickQual dashboard or the "My QuickQuals" page.
- Start by navigating to your QuickQual dashboard or the "My QuickQuals" page.
-
- Find the file for which you wish to update the realtors.
-
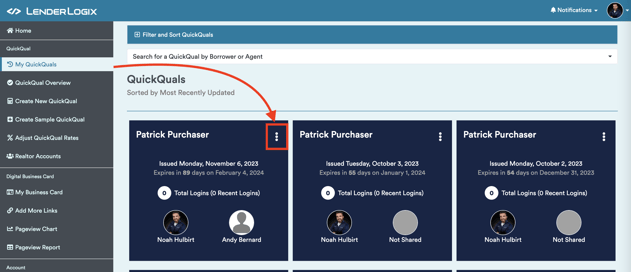
- Click on the three dots (vertical ellipsis) icon associated with the file.
- Click on the three dots (vertical ellipsis) icon associated with the file.
-
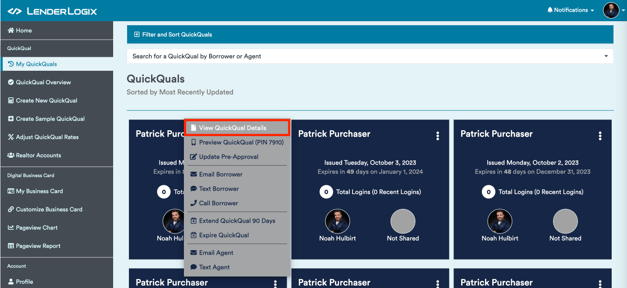
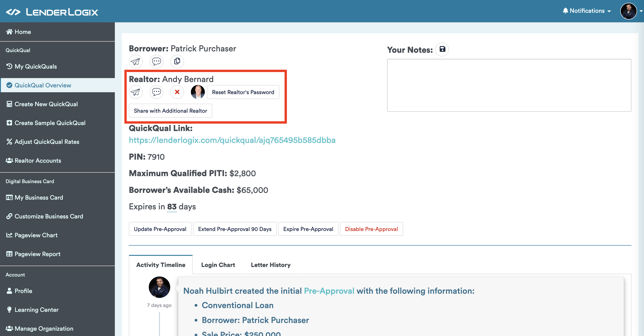
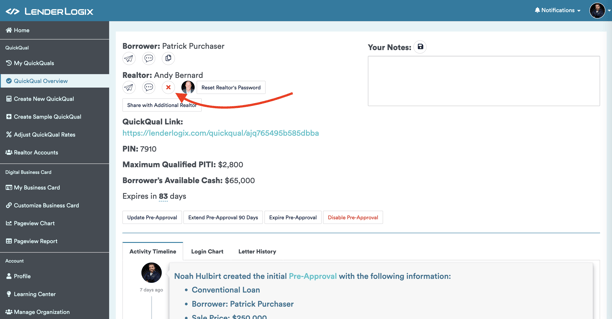
- In the upper left-hand corner of the screen, you'll find the realtor information for the selected file:
- In the upper left-hand corner of the screen, you'll find the realtor information for the selected file:
-
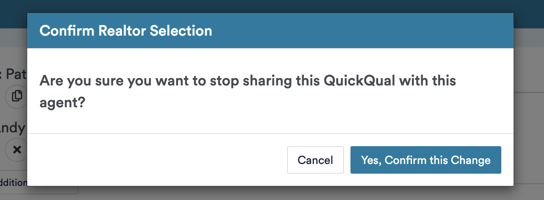
- To remove an existing agent, click on the 'x' next to their name.
- You'll be prompted to confirm that you want to remove the agent.
- To remove an existing agent, click on the 'x' next to their name.
-
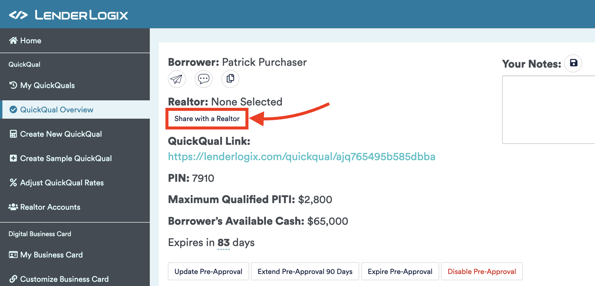
- To add a new agent, select the "Share with a Realtor" and select your agent from our database:
- If you don't see your agent in our database, you can add them by selecting the "Can't Find Your Realtor? Add Them Now" button:
- To add a new agent, select the "Share with a Realtor" and select your agent from our database:

-
- You have the option to add multiple agents! One QuickQual can have up to two agents associated with it. All you have to do is select the "Share with Additional Realtor" button:
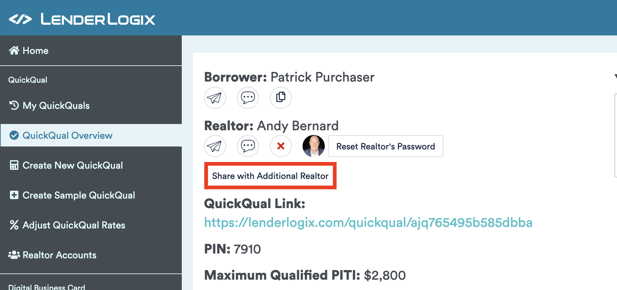
- Note: When two agents have access to a QuickQual, neither can see that the other has access to it.
- You have the option to add multiple agents! One QuickQual can have up to two agents associated with it. All you have to do is select the "Share with Additional Realtor" button:
By following these steps, you can effortlessly manage your realtors within your QuickQual account, making it easy to add, remove, or update realtor information as needed.